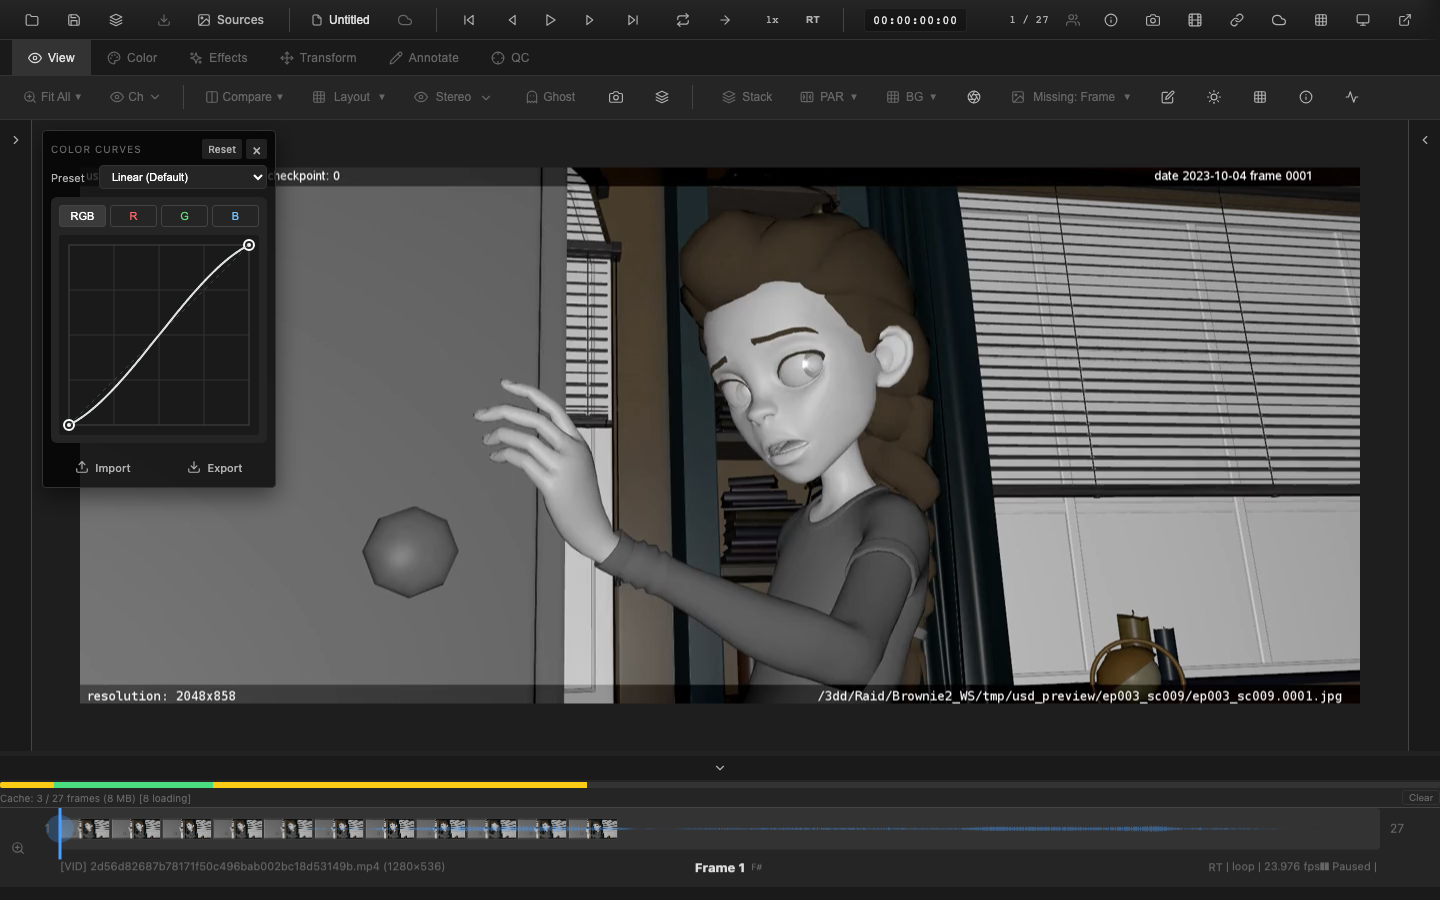
Curves Editor
The curves editor provides spline-based tonal adjustments for precise control over brightness, contrast, and color balance. Each channel can be shaped independently using an interactive point-based interface with real-time GPU preview.
Opening the Curves Editor
Press U to toggle the curves panel. The panel can also be opened from the Color tab context toolbar by clicking the Curves button. The panel is draggable and can be repositioned by dragging its header bar. Press Escape or click the close button to dismiss.
Channel Tabs
The curves editor provides four independent channels:
| Tab | Description |
|---|---|
| Master | Applies to all channels simultaneously. Affects overall brightness and contrast. |
| R (Red) | Adjusts only the red channel. |
| G (Green) | Adjusts only the green channel. |
| B (Blue) | Adjusts only the blue channel. |
Per-channel curves are applied first, then the master curve is applied on top. This ordering allows per-channel color balance adjustments to be refined by an overall contrast curve.
Editing Curves
Adding Points
Click anywhere on the curve canvas to add a new control point. The point is inserted at the clicked position and the curve reshapes to pass through all points using monotonic cubic spline interpolation.
Dragging Points
Click and drag any existing control point to reshape the curve. Points are constrained:
- The first point (black) can only move vertically (its X position is locked to 0.0).
- The last point (white) can only move vertically (its X position is locked to 1.0).
- Interior points can move freely in both axes but cannot cross adjacent points horizontally.
Deleting Points
Select a point and press Delete to remove it. The first and last points cannot be deleted -- they anchor the curve at the input boundaries.
Presets
The curves editor includes built-in presets accessible from the dropdown menu:
| Preset | Description |
|---|---|
| Linear (Default) | Identity curve -- no adjustment. Two points: (0,0) and (1,1). |
| S-Curve (Mild) | Gentle contrast boost. Darkens shadows slightly, brightens highlights. |
| S-Curve (Strong) | Aggressive contrast enhancement. |
| Lift Shadows | Raises the shadow region, revealing detail in dark areas. |
| Crush Blacks | Clips the darkest values to pure black, increasing perceived contrast. |
| Lower Highlights | Pulls down the highlight region, reducing peak brightness. |
| Film Look | Combined shadow lift and highlight compression with slight midtone warmth, emulating analog film response. |
| Cross Process | Per-channel color shifts on the red and blue channels, creating the characteristic cross-processed film effect. |
Selecting a preset replaces the current curve configuration on the active channel (or master, depending on the preset).
Import and Export
Export
Click the Export button to save the current curves configuration as a JSON file. The exported file contains all four channels (master, red, green, blue) with their point data and enabled states.
Import
Click the Import button and select a previously exported JSON file. The curves configuration is validated and applied immediately. Invalid files are silently rejected.
// Export curves to JSON
const json = window.openrv.color.exportCurvesJSON();

// Import curves from JSON
window.openrv.color.importCurvesJSON(json);

// Alternative: use getCurves/setCurves for manual manipulation
const curvesData = window.openrv.color.getCurves();
window.openrv.color.setCurves(curvesData);
Reset
Click Reset in the curves panel header to restore all channels to the default identity curve (two points: 0,0 and 1,1).
VFX Use Case
The Film Look preset emulates the characteristic S-curve response of analog film stock -- lifted shadows, compressed highlights, and a slight midtone warmth. This is useful during comp review to approximate the final DI grade before the colorist has delivered the show LUT. For compositing QC, use per-channel curves to verify that a comp's black levels and highlight response match the plate.
Pipeline Note
Curves provide finer control than the contrast slider when you need different amounts of contrast in shadows vs. highlights. During review, a gentle S-curve on the master channel (the "S-Curve Mild" preset) is a quick way to add punch to flat log plates without waiting for a grade.
Pipeline Position
Curves are applied at stage 6c in the rendering pipeline, after CDL and color wheels, and before the Look LUT. The curves engine builds a 256-entry lookup table for each channel, which is uploaded to the GPU as a texture. The fragment shader samples this texture for each pixel, providing constant-time curve evaluation regardless of the number of control points.
HDR headroom is preserved: pixel values above 1.0 are separated before curve application and added back afterward, ensuring that super-white values are not clipped by the 0-1 range of the curve LUT.
Related Pages
- Primary Color Controls -- exposure, contrast, and other primary adjustments
- CDL Workflow -- ASC CDL slope/offset/power correction
- LUT Loading -- applying look-up tables for color transforms
- Rendering Pipeline -- full pipeline stage ordering