Playlist Management
OpenRV Web supports multi-clip playlists for reviewing sequences of shots in a defined order. The playlist system manages clip ordering, per-clip in/out points, and loop behavior, providing a lightweight editorial timeline within the viewer.
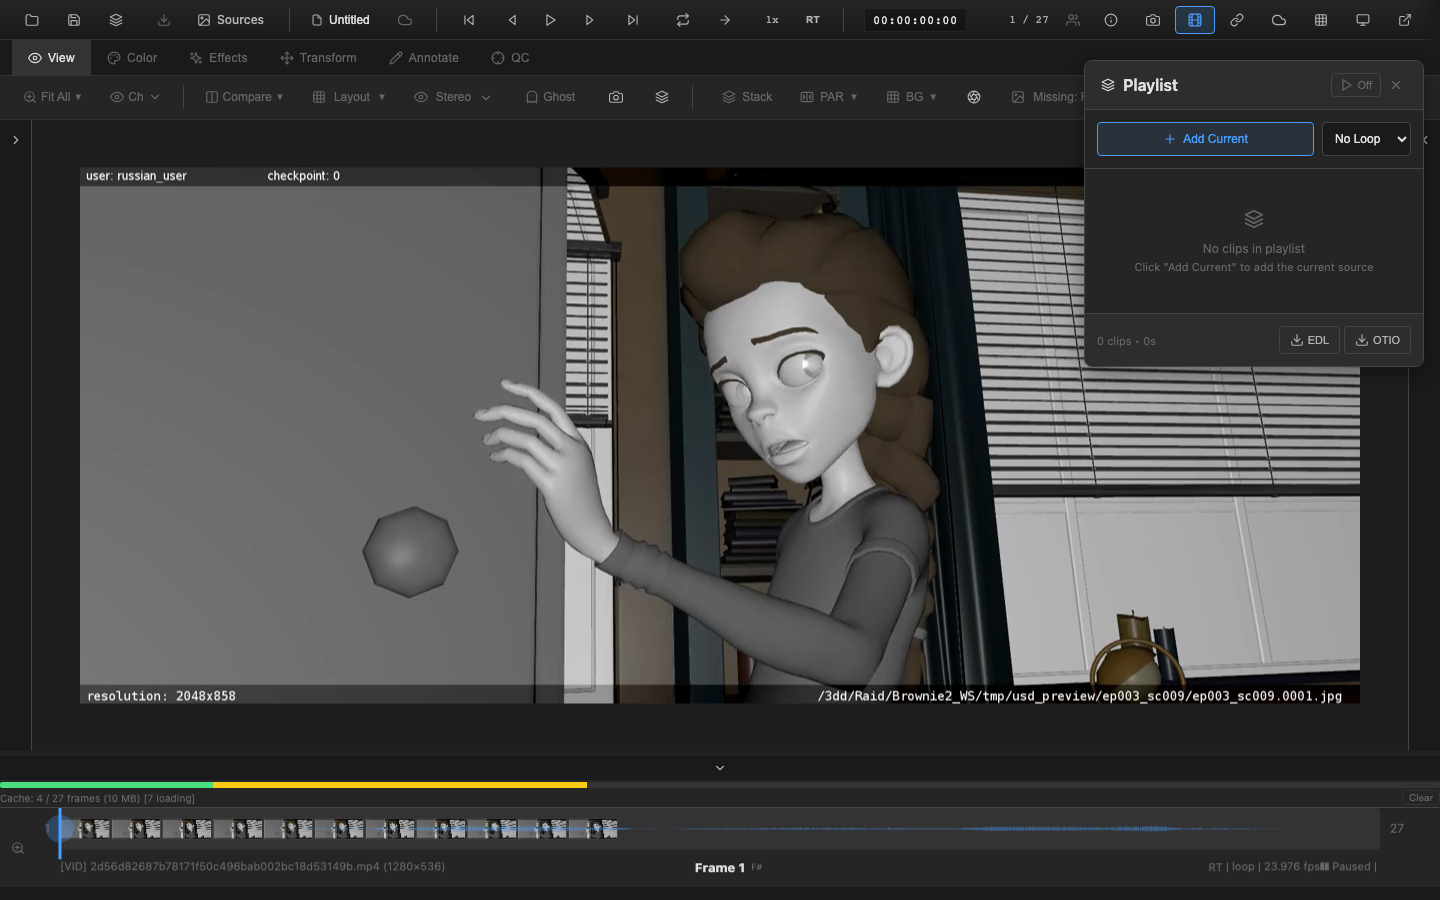
Creating a Playlist
Open the Playlist panel by pressing Shift+Alt+P. The panel provides controls for building and managing the clip list.
To start a new playlist:
- Load the first media source into the viewer
- Open the Playlist panel
- Click Add Current to add the loaded source as a clip
- Load additional sources and repeat the Add Current step for each
The Playlist panel header includes an enable/disable toggle that activates or deactivates playlist mode. When playlist mode is active, playback follows the clip sequence rather than the individual source timeline.
Adding and Removing Clips
Adding Clips
The Add Current button inserts the currently loaded source as a new clip at the end of the playlist. Each clip captures:
- The source index in the session
- The source display name
- Default in/out points covering the full source duration
Multiple clips from the same source can be added with different in/out points to repeat or segment a shot within the playlist.
Removing Clips
Each clip in the list has a remove button (X icon). Clicking the remove button deletes the clip from the playlist and recalculates the global timeline positions of all remaining clips. Removing a clip does not unload the source media from the session.
Reordering Clips
Clips can be reordered by dragging them within the playlist panel. Grab a clip by its handle area and drag it to the desired position. The global start frames are recalculated automatically when clips are moved.
The playlist footer displays the total clip count and the combined duration of all clips.
Per-Clip In/Out Points
Each clip has independent in and out points that define which portion of the source media is included in the playlist.
- In point: The first frame of the source to include (default: frame 1)
- Out point: The last frame of the source to include (default: last frame)
- Duration: Calculated automatically as
outPoint - inPoint + 1
In/out points are displayed on each clip card in the panel and can be edited from the clip's detail controls. Changing in/out points updates the global timeline positions of all subsequent clips.
The playlist system maps global playlist frames to source-local frames. For example, if clip 1 has 100 frames and clip 2 starts at an in point of 25, global frame 110 corresponds to local frame 35 in clip 2.
Loop Modes
The loop mode selector at the top of the Playlist panel controls playback behavior at clip and playlist boundaries:
| Mode | Behavior |
|---|---|
| No Loop | Playback stops when the last frame of the last clip is reached. A playlistEnded event is emitted. |
| Loop Clip | The current clip loops indefinitely. Playback does not advance to the next clip. |
| Loop All | The entire playlist loops. After the last frame of the last clip, playback returns to the first frame of the first clip. |
Loop mode can also be changed through the scripting API.
Retiming
Playlist clips support time remapping through the retime system. Each clip can be retimed with:
- Speed scale: Scale the playback speed (e.g., 0.5 for half speed, 2.0 for double speed).
- Reverse: Play the clip in reverse.
- Frame offset: Shift the starting frame within the source.
- Explicit frame mapping: Map specific output frames to arbitrary input frames for freeze frames or irregular timing.
- Warp keyframes: Define speed ramps with keyframed rate values for smooth speed transitions.
Retime settings from imported RV/GTO sessions (including explicit and warp modes) are preserved and applied correctly.
Playlist Transitions
OpenRV Web supports GPU-accelerated transitions between playlist clips. Transitions are rendered by blending the outgoing and incoming frames through a dedicated transition shader.
| Type | Description |
|---|---|
| Cut | Instant switch (default, no transition) |
| Crossfade | Linear opacity blend between outgoing and incoming frames |
| Dissolve | Smooth dissolve with configurable duration |
| Wipe | Directional reveal of the incoming frame |
Transition duration and type are configurable per cut point in the Timeline Editor. Both outgoing and incoming frames pass through the full viewer color pipeline before blending.
ShotGrid Playlist Import
When the ShotGrid integration is connected (see DCC Integration -- ShotGrid), playlists can be loaded directly from ShotGrid. Selecting a ShotGrid playlist in the ShotGrid panel fetches all versions in the playlist, loads each version's media into the session, and automatically builds a review playlist preserving the clip order from ShotGrid.
Each imported clip records ShotGrid metadata (version ID and shot name), and the version's ShotGrid status is applied to the session's status manager. If a version's media cannot be loaded (e.g., the URL is unreachable), it is skipped with a warning and the remaining versions continue loading.
ShotGrid playlist import requires a PlaylistManager to be wired into the integration bridge. Without it, versions are loaded into the session but no playlist is created.
EDL Export and OTIO Import
The playlist can be exported as a CMX 3600 EDL file using the EDL button in the playlist panel footer. EDL export generates a standard-format edit decision list with SMPTE timecodes at the session frame rate.
For detailed information on EDL format, timecode conventions, OTIO import, and conform workflows, see EDL and OTIO.
Timeline Editor
The Timeline Editor provides a visual representation of the playlist as colored blocks on a horizontal track. The editor supports:
- Visual cut display: Each clip appears as a colored block proportional to its duration
- Drag handles: Trim in/out points by dragging the edges of each cut
- Reorder: Drag cuts to rearrange their order
- Zoom: Adjust the timeline scale from 0.5x to 10x pixels per frame
- Frame ruler: A ruler with frame numbers and markers above the track
- Selection: Click a cut to select it; right-click for a context menu with delete options
The Timeline Editor and Playlist panel stay synchronized. Changes in either view are reflected immediately in the other.
Related Pages
- EDL and OTIO -- EDL export format and OTIO import
- Session Management -- Playlist state in session persistence
- Review Workflow -- Using playlists in dailies sessions
- Scripting API -- Programmatic playlist control
- Loop Modes and Stepping -- Per-clip loop behavior