UI Overview
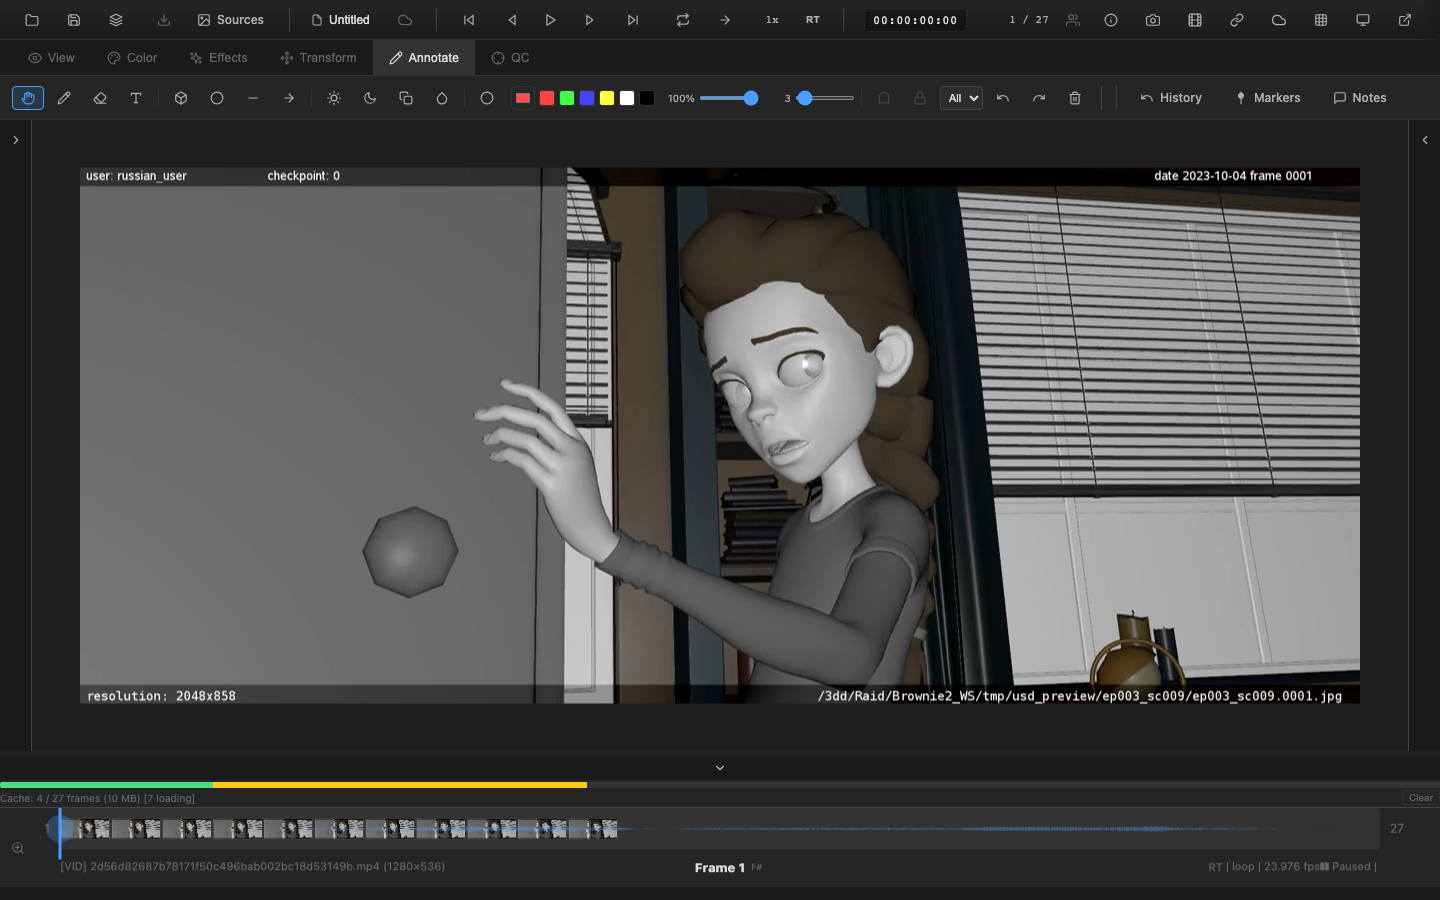
OpenRV Web organizes its interface into a header bar, context toolbar, viewer canvas, and timeline. Floating panels provide additional controls without obscuring the image. This page describes every major area of the interface and how they interact.
Layout Structure
The application uses a vertical layout with four main regions stacked from top to bottom:
+----------------------------------------------------------+
|  Header Bar (tabs, playback controls, utilities)         |
+----------------------------------------------------------+
|  Context Toolbar (changes based on active tab)           |
+----------------------------------------------------------+
|                                                          |
|                    Viewer Canvas                         |
|              (image/video display area)                  |
|                                                          |
+----------------------------------------------------------+
|  Timeline (frame navigation, thumbnails, waveform)       |
+----------------------------------------------------------+
Floating panels (color controls, histogram, markers, snapshots, etc.) overlay the viewer canvas and can be toggled on and off independently.

Header Bar

The header bar spans the full width of the application and contains three groups of controls.
File Operations (Left)
- Open button (folder icon) -- opens the file picker to load images, videos, or session files
- Session name -- displays the current project name (defaults to "Untitled")
Tab Navigation (Center-Left)
Five numbered tabs control which context toolbar appears below:
| Key | Tab | Purpose |
|---|---|---|
1 | View | Zoom, channel selection, compare tools, pixel probe |
2 | Color | Exposure, contrast, saturation, temperature, tint, and other color adjustments |
3 | Effects | Noise reduction, sharpen, deinterlace, film emulation, stabilization |
4 | Transform | Rotation, flip, crop, uncrop, lens distortion, perspective correction |
5 | Annotate | Pen, eraser, text, shapes, spotlight, ghost/hold modes |
Press the corresponding number key to switch tabs. The active tab is highlighted with the accent color.
A sixth tab, QC (key 6), provides quality control tools for review workflows including shot status tracking and version management.
Playback Controls (Center)
The playback control group includes:
- Step backward (
Left Arrow) -- move one frame back - Play/Pause (
Space) -- toggle playback - Step forward (
Right Arrow) -- move one frame forward - Go to start (
Home) -- jump to first frame or in point - Go to end (
End) -- jump to last frame or out point - Direction toggle (
Up Arrow) -- switch between forward and reverse playback - Speed button -- displays current speed (e.g., "1x"); click to cycle presets, right-click for speed menu
- Loop mode -- icon-only button; hover tooltip shows current mode (Loop, Ping-Pong, Play Once); click to cycle
Source Header Controls
When media is loaded, additional controls appear in the header bar next to the source name:
- Representation selector -- a dropdown that appears when a source has multiple media representations (e.g., Frames, Movie, Proxy, Stream). Click to switch between representations. The selector is hidden when only one representation is available.
Utilities (Right)
- Volume control -- mute button with expandable slider on hover
- Auto-save indicator -- shows save status (saving, saved, error, disabled)
- Export button -- dropdown with frame export, video export, annotation export, and EDL export options
- Theme toggle (
Shift+T) -- cycle between auto (system), dark, and light themes - Fullscreen (
F11) -- toggle fullscreen mode
Context Toolbar
The context toolbar sits directly below the header bar and changes content based on the active tab. Each tab populates this bar with relevant controls.
View Tab Toolbar
- Zoom dropdown -- preset zoom levels (Fit, 25%, 50%, 100%, 200%, 400%)
- Channel select -- dropdown to isolate Red, Green, Blue, Alpha, or Luminance channels
- Compare dropdown -- wipe mode, split screen, A/B switching, difference matte, blend modes
- Pixel probe toggle (
Shift+I) - Background pattern selector (
Shift+B) -- checkerboard, grey 18%/50%, white, black, crosshatch, custom
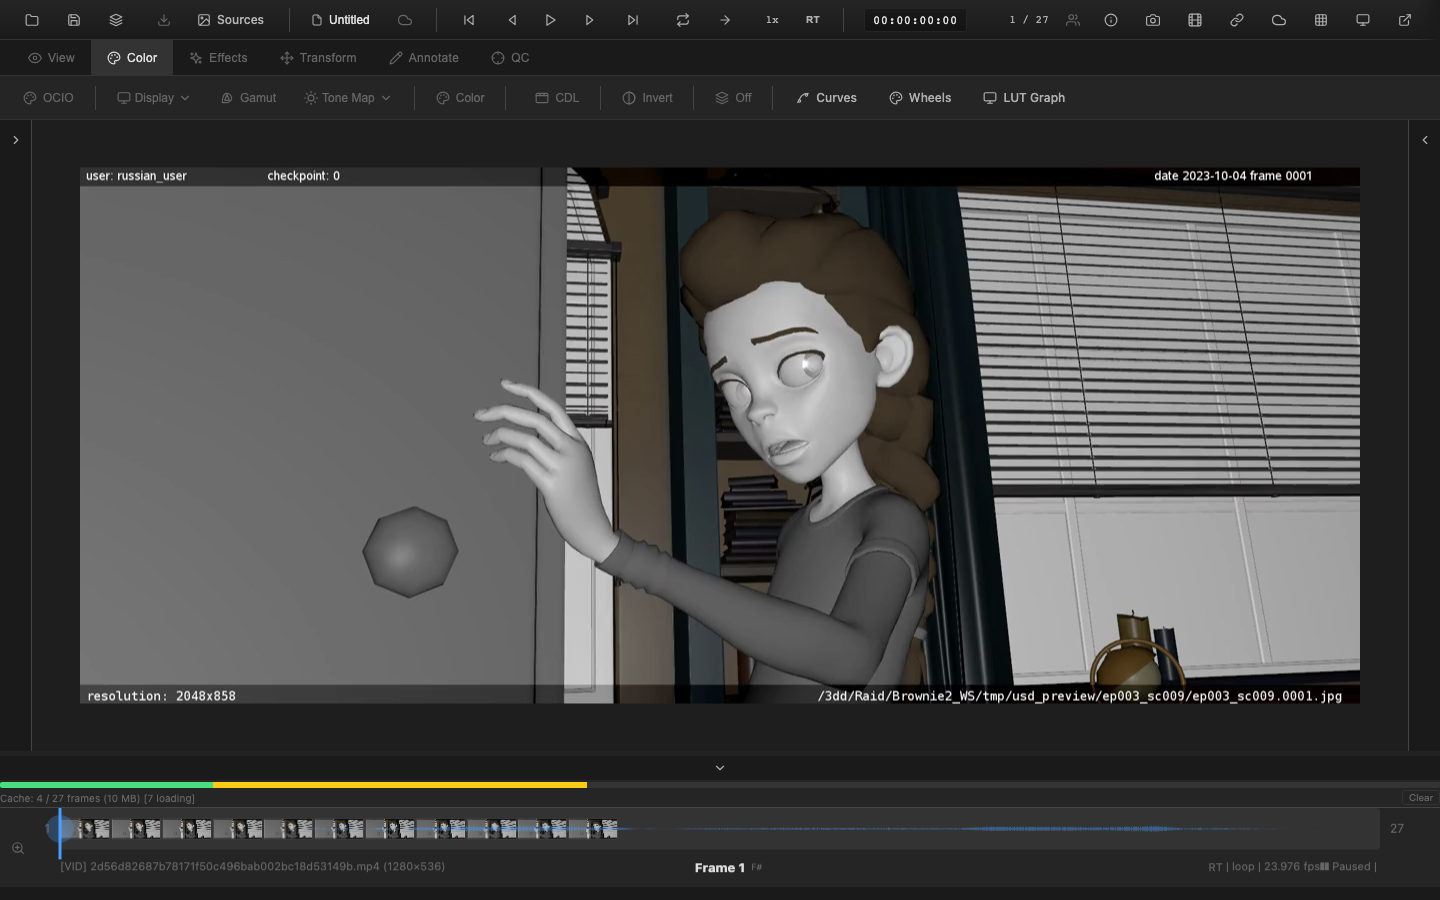
Color Tab Toolbar
- Color panel toggle (
C) -- opens the floating color adjustment panel with exposure, gamma, contrast, saturation, brightness, temperature, tint, vibrance, clarity, highlights, shadows, whites, and blacks - Curves (
U) -- opens the curves editor panel - Color wheels (
Shift+Alt+W) -- opens lift/gamma/gain three-way color wheels - HSL Qualifier (
Shift+H) -- opens secondary color selection - CDL -- ASC CDL slope/offset/power/saturation controls
- LUT -- load and manage 1D/3D LUTs
- OCIO (
Shift+O) -- OpenColorIO color pipeline controls - Log curves -- camera-specific log-to-linear presets
- Tone mapping -- Reinhard, Filmic, ACES operators
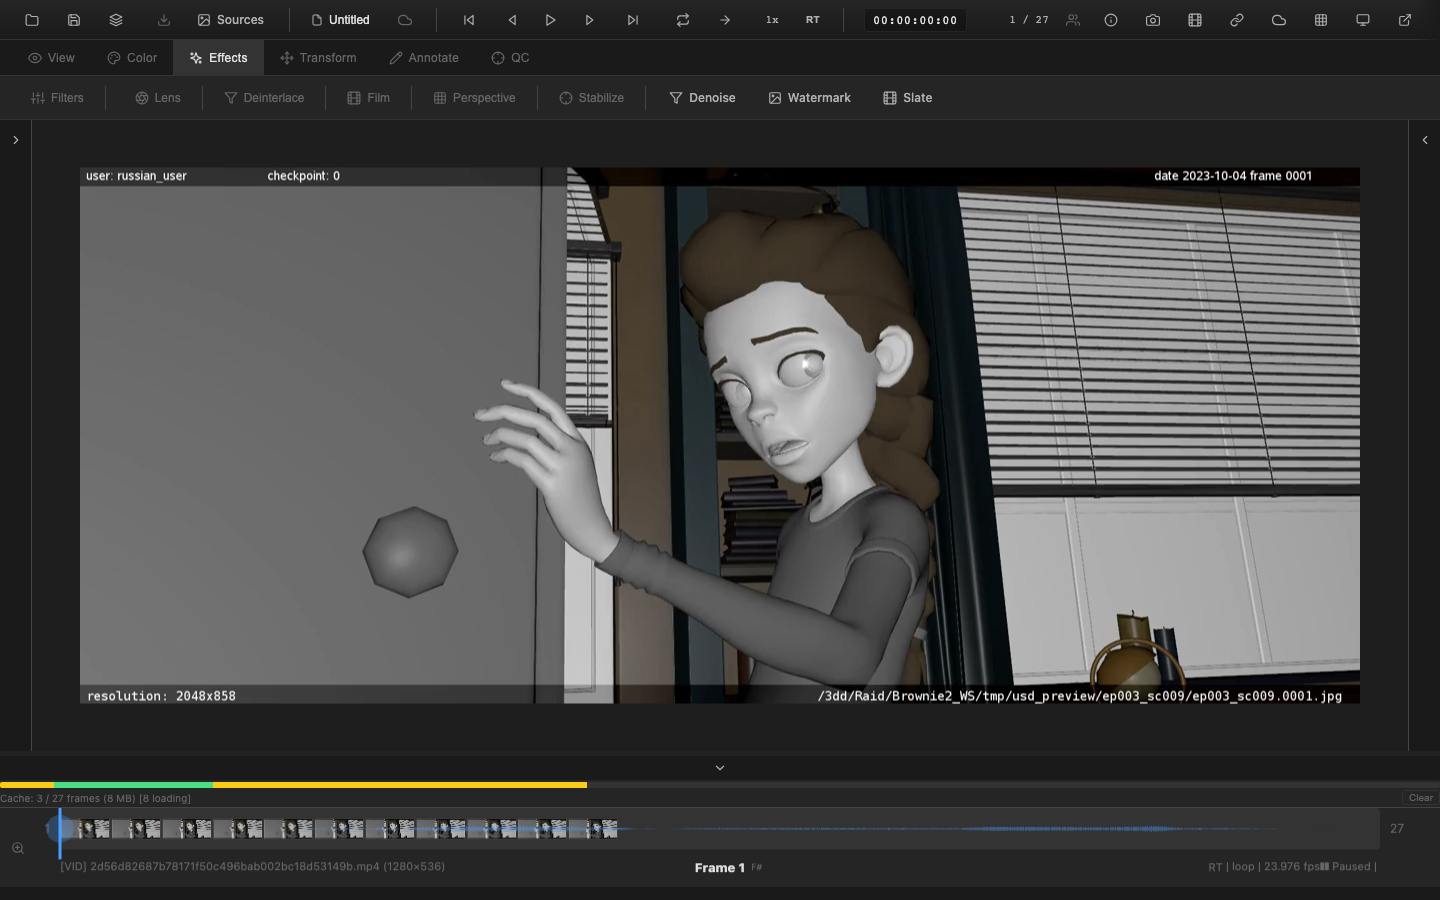
Effects Tab Toolbar
- Noise reduction -- bilateral filter with configurable strength
- Sharpen -- unsharp mask
- Deinterlace -- bob, weave, blend methods
- Film emulation -- classic film stock presets with grain
- Stabilization -- 2D motion stabilization preview
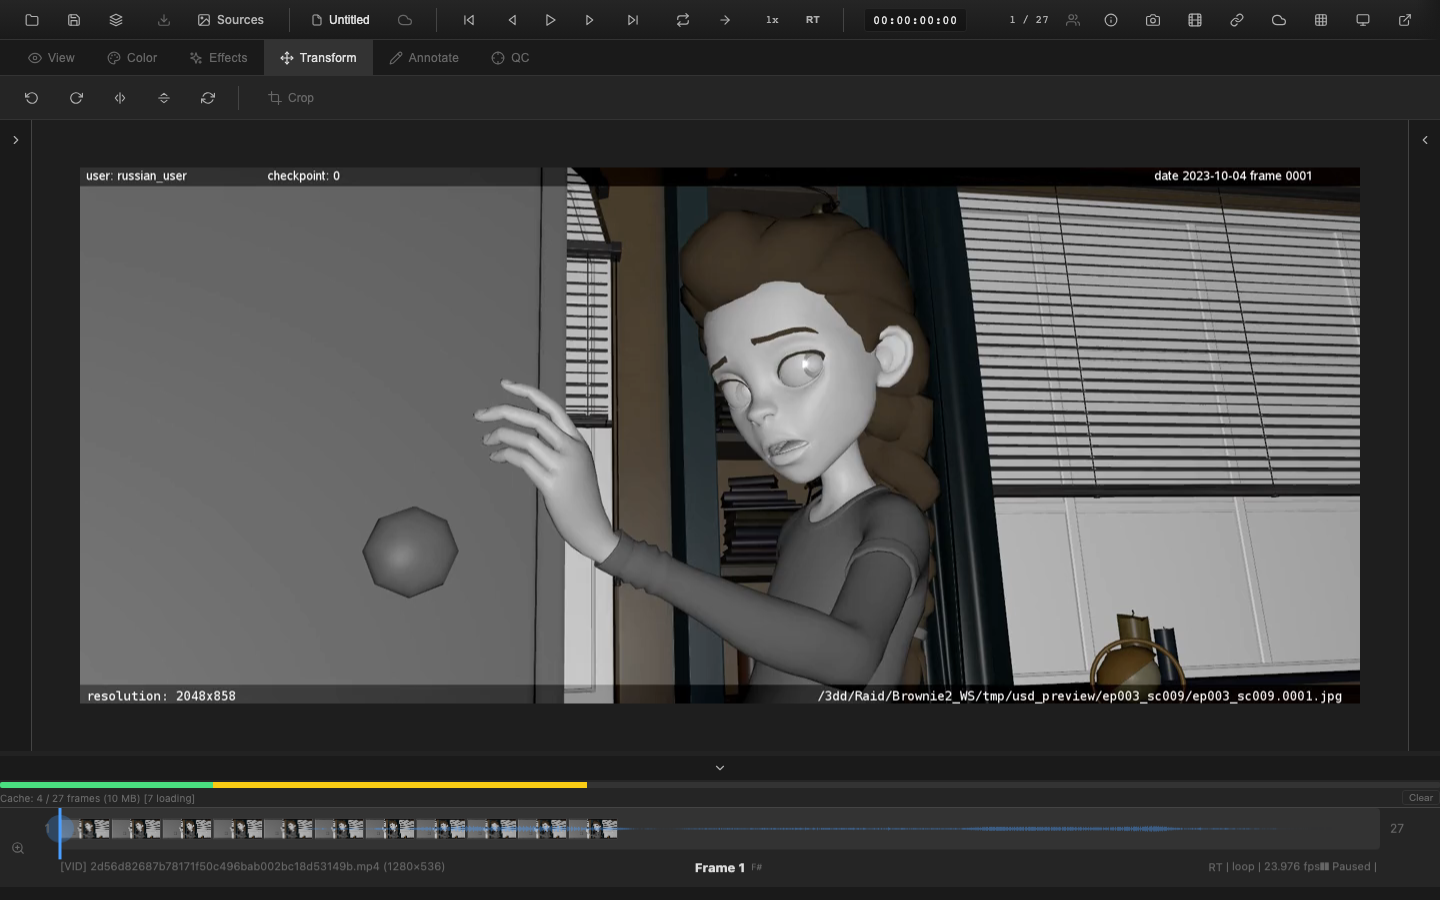
Transform Tab Toolbar
- Rotate left (
Shift+R) and Rotate right (Alt+R) -- 90-degree rotation - Flip horizontal (
Alt+H) and Flip vertical (Shift+V) - Crop (
Shift+K) -- with aspect ratio presets and rule-of-thirds guides - Uncrop -- add padding with custom fill color
- PAR (
Shift+P) -- pixel aspect ratio correction - Lens distortion -- barrel/pincushion correction
- Perspective -- four-point perspective transform
- Reset -- restore all transforms
Annotate Tab Toolbar
- Tool selection -- Pan (
V), Pen (P), Eraser (E), Text (T), Rectangle (R), Ellipse (O), Line (L), Arrow (A) - Brush settings -- type toggle (
Bfor soft/hard), width slider, color picker with presets - Undo (
Ctrl+Z) / Redo (Ctrl+Y) / Clear frame - Ghost mode (
G) -- show annotations from nearby frames - Hold mode (
X) -- persist annotations across all subsequent frames - Spotlight (
Shift+Q) -- dim everything except a highlighted region
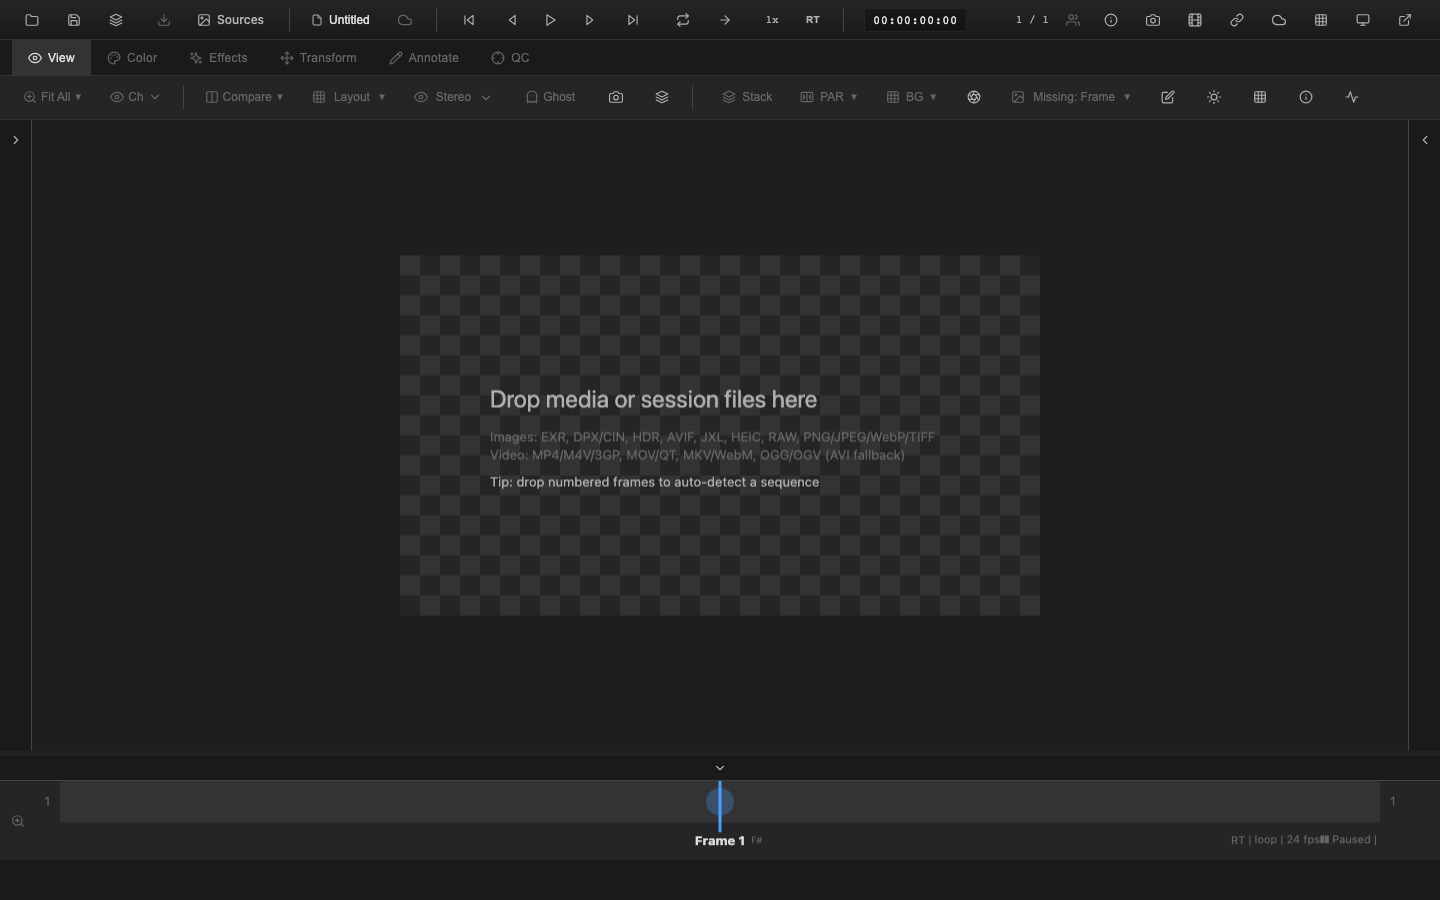
Viewer Canvas
The viewer canvas occupies the central area and displays the loaded image or video frame. It supports the following interactions:
- Drag to pan when zoomed in or when the pan tool is active
- Scroll wheel to zoom, centered on the cursor position
- Pinch gesture to zoom on trackpads and touch devices
- Click on the canvas with the pixel probe enabled to lock the probe position
- Drag and drop files onto the canvas to load media
The viewer renders all images through the WebGL2 fragment shader pipeline, applying color corrections, LUTs, tone mapping, and display transforms in real time.
A/B Indicator
When two sources are loaded, a small badge in the viewer corner shows "A" or "B" to indicate the active source. During split screen mode, A and B labels appear on each side instead.
Overlays
The viewer supports multiple overlay types that can be enabled independently:
- Timecode (
Shift+Alt+T) -- SMPTE timecode display - Safe areas (
;) -- title safe, action safe, rule of thirds, center crosshair - False color (
Shift+Alt+F) -- exposure visualization - Zebra stripes (
Shift+Alt+Z) -- animated exposure warning stripes - Clipping overlay -- red for blown highlights, blue for crushed shadows
- Missing frame -- indicator for gaps in image sequences
- EXR window -- data/display window boundary visualization
- Matte -- letterbox/pillarbox with configurable aspect ratio
- Bug -- corner logo with configurable position, size, and opacity
- Watermark -- logos with 9 preset positions
Timeline
The timeline bar at the bottom of the screen displays:
- Playhead -- blue indicator showing the current frame position
- Thumbnails -- preview images distributed across the timeline track
- Audio waveform -- semi-transparent overlay when media includes audio
- In/out brackets -- blue markers defining the playback range
- User marks -- colored vertical lines at marked frames (set with
M) - Annotation markers -- yellow triangles below the track for frames with annotations
- Frame numbers -- start and end frame labels
- Source info -- type badge, filename, and resolution
- Playback status -- playing/paused state, FPS, and loop mode
Click on the timeline to seek to a frame. Drag to scrub through frames. Press , and . to jump between annotated frames.
Floating Panels
Floating panels provide detailed controls without permanently consuming screen space. Each panel can be toggled via keyboard shortcut or toolbar button.
| Panel | Shortcut | Description |
|---|---|---|
| Color controls | C | Primary color adjustment sliders |
| Curves | U | Master/R/G/B channel curve editor |
| Color wheels | Shift+Alt+W | Lift/Gamma/Gain three-way correction |
| HSL Qualifier | Shift+H | Secondary color selection |
| Histogram | (none by default) | RGB/luminance histogram |
| Waveform | (none by default) | Luma/RGB/Parade/YCbCr waveform |
| Vectorscope | Y | Color vector display |
| Pixel probe | Shift+I | Real-time pixel value readout |
| Markers | Shift+Alt+M | Marker list with notes and colors |
| Info panel | Shift+Alt+I | Filename, resolution, frame, FPS |
| History | Shift+Alt+H | Visual undo/redo with state jumping |
| Snapshots | Ctrl+Shift+Alt+S | Named session snapshots |
| Playlist | Shift+Alt+P | Multi-clip playlist manager |
| OCIO | Shift+O | OpenColorIO color management |
Press Escape to close the currently open panel.
Theme Switching
Press Shift+T to cycle between three theme modes:
- Auto -- follows the operating system preference (light or dark)
- Dark -- dark background, designed for color-critical work in dimly lit environments
- Light -- light background, suitable for well-lit offices
All UI colors are defined through CSS variables, ensuring consistent theming across every component.
Fullscreen and Presentation
Press F11 to toggle native fullscreen mode. The browser chrome disappears, giving the viewer maximum screen space.
Press Ctrl+Shift+P to enter Presentation mode. This hides all UI elements (header, toolbar, timeline) and displays only the image. The cursor auto-hides after a period of inactivity. This mode is ideal for client reviews and dailies sessions.
The External Presentation feature (BroadcastChannel-based) opens a second browser window that displays text-only status information (frame number, playback state, and color setting values) synchronized with the main window. It does not render the actual viewer image. Use this to show metadata on a secondary display while maintaining controls on the primary screen. Full viewer mirroring is tracked in issue #29.
Accessibility
OpenRV Web includes an ARIA announcer that provides screen reader support for key UI actions. State changes such as playback start/stop, frame navigation, source loading, and tool selection are announced via a live region so that assistive technology users receive audio feedback.
Many controls include ARIA attributes and keyboard support. For example, the collapsible section headers in the inspector panels use role="button", aria-expanded, and respond to Enter/Space keys. The Pixel Probe value rows similarly use role="button" with tabindex="0" and keyboard handlers for copy-to-clipboard. Format selection buttons, sample size buttons, and source mode toggles use semantic <button> elements with aria-label and aria-pressed attributes.
However, not all interactive elements meet full semantic HTML standards yet. Known gaps include:
- The Pixel Probe value rows use
<div>elements with ARIA roles rather than semantic<button>elements (see #75). - The inspector accordion headers use
<div>elements with ARIA roles rather than semantic<button>elements (see #65). - Some list items (e.g., history entries) are mouse-only click targets without keyboard operability or ARIA roles.
Related Pages
- Quick Start -- load files and learn basic controls
- Timeline Controls -- detailed timeline guide
- Keyboard Shortcuts Reference -- complete shortcut table
- Channel Isolation -- view individual channels